Friday, April 17, 2015

SCCM2012 Client Installation Error

When you try to install SCCM client, If you install the SCCM for first time and you have not configured your Boundary groups then you will get the below mentioned error
Error: Some of the selected resources are not assigned to any site
clip_image002
To resolve this Go in to Admiration > Boundary Groups > Then select Create new Boundary Group
clip_image008
Give a Name for the new boundary group and add the boundaries in the second window.
clip_image010
Go to References and Select
1. Use the boundary group for the site assignment
2. Assign the site from the drop down box
3. Add the Site system Server
clip_image011
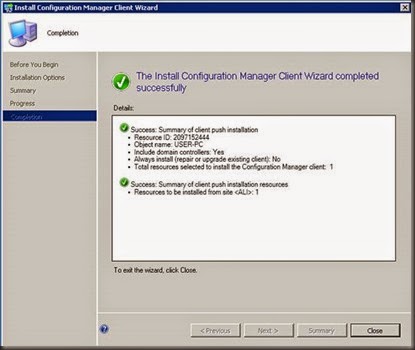
Click ok to continue.  Once you finished with that you can go to devices and try to Install Client
clip_image004
clip_image006 
clip_image013
clip_image015


Thursday, April 16, 2015

SCCM2012 Installation Error

 
When you try to configure SCCM 2012 with SQL 2012 sometime you will get the below mentioned error message.
“The logon account for the SQL Server service cannot be a local user account, NT SERVICE\<sql service name> or LOCAL SERVICE. You must configure the SQL Server service to use a valid domain account, NETWORK SERVICE, or LOCAL SYSTEM.”
clip_image002
To troubleshoot this you can follow the below mentioned steps.
Go in to SQL 2012 Server, click Start > SQL Server Configuration Manager
clip_image004
Then Click SQL Server Services > in the right window pane, right-click SQL Server <instance name>, click Properties
clip_image006
Click the Log On tab, click “This account”, click browse then select the AD account which you have created before with the Password.
clip_image007
Once you done with that, Re-run the Prerequisite Check for SCCM 2012 and validate that you do not see the prerequisite for SQL Server service as a warning or failure.
clip_image009


Saturday, November 22, 2014

[Solved] please wait for the windows module installer

After installing the windows updates, the server giving an error saying that "Please wait for the Windows Modules Installer" and automatically restarting the server. Try to logging as Safe mood. Then tried all other options that windows is giving under log on window. but same screen came and cannot logging to the server.
This PC is a virtual one and when I try to attach a ISO file and boot from that unfortunately that was also not worked.

clip_image001

Found that when this PC is boot up, I can ping and access the drivers attached to that server. Means I have 50% chance to remotely change the settings in this PC.

clip_image003

Then I log in to another server by using admin credentials and go in to services. under that you have a feature to remotely access other computer services. Please follow the below mentioned steps to try that.

Go to Services then  right click and select connect to another Computer.

clip_image004

Find the computer name from the active directory computer group. If the PC is not under a domain you can try this by using the IP address.


clip_image005

Then when you go down you can see that "Windows Modules Installer" Service is  up and running.

clip_image009 

Disable the "Windows Modules Installer" Service and reboot your server. Once this service disabled server will automatically back to the logging screen.
 
clip_image010 

Hope this will help you to reduce the time wasting for finding solution for  "please wait for the windows module installer " issue.   :)


Saturday, August 16, 2014

How to Install the FSRM (File Server Resource Manager) in Windows Server 2012


File Server Resource Manager is a suite of tools that allows administrators to understand, control, and manage the quantity and type of data stored on their servers. By using File Server Resource Manager, administrators can place quotas on folders and volumes, actively screen files, and generate comprehensive storage reports. This set of advanced instruments not only helps the administrator to efficiently monitor existing storage resources but it also aids in the planning and implementation of future policy changes.

To do this, I have created a Virtual PC with Windows 2012 Server and Promoted the server as a Domain controller. then enable the file Serve.

To enable FSRM you can follow the below mentioned steps.

Go in to Manage > Add Roles and Features

image

Click Next.

image

Next window you can select Role-based or Feature-based installation

image

Need to Select the destination Server from next window.

image

Then Select the File Server Resource Manager under File And Storage Service > File and iSCSI Services

image

Here you need to click Add Feature.

image

In next window you can click next because we don’t want to add any additional feature.

image

Click Install after check the confirmation window.

image

image

Restart the Server and once the Server boot up, you can find the FSRM Service under Tools.

Server Manager > Tools > File Server Resource Manager

image

image

Hope this will help you to configure your FSRM service in Windows 2012 server and I’ll try to cover How to assign Folder Quotas , File Screening, Storage Reports, Event Log Integration, Automated Scripts and E-mail Notification configuration on FSRM.

How to disable Autoconfiguration IPv4 Address in Windows 2012 Server


This issue I saw in Windows 2012 Sever and got to  know that this can be seen in Windows 2008 and Windows 7 PC’ also. hope below steps will help you to resolve the IP Address conflicting issue in your virtual environment.

When you enter Ipconfig /all command you will see something like this.

C:\Windows\system32>ipconfig /all

image

First you need to check the ip version 4 interfaces and the interface ID numbers. for that you can type,

C:\Windows\system32>netsh interface ipv4 show inter

image

Now you know your Ethernet interface ID is no 12. Then you can run below mentioned command.

C:\Windows\system32>netsh interface ipv4 set interface 12 dadtransmits=0 store=persistent

image

After that you need to  restart your Server and once it boot up, check the network settings.

C:\Windows\system32>ipconfig /all

image

Now Your server will work with the network settings which you have entered.

After restarting your server still if you are getting the Same error. you can do a DHCP service restart by going in to Services (Type Services.msc  in CMD) then restart the DHCP Service.

image

image

Hope this helps you.. Smile

Tuesday, September 17, 2013

(solved) - 'ping' is not recognized as an internal or external command,operable program or batch file.


  When you are try to ping some destination IP address and if you are getting above mentioned error,  you can follow these steps to resolve this.
This error will be prompt when you try to run Ping, tracert (trace route), etc..
1
Go in to Advanced system settings in your PC
2
Then Click Advanced and select Environment Variables.
3
Then Select 'PATH' from the list of system variables and edit and set PATH to c:\windows\system32
6
Hope this will help you to solve your problem
7
If not you can use below mentioned command to make it work,
first go to CMD and type,
dir %SystemRoot%\System32\ping.exe
path %path%;%SystemRoot%\System32
After successfully enter those commands you are able to use "ping" command. 
8

Monday, May 6, 2013

How to set up a Mirrored Array in Windows 2012

Even with the best backup solution, a hard drive crashes, you’ll lose a few hours of work. By enabling drive mirroring in Windows 2012, you’ll always have an up-to-date copy of your data.
This is a software implementation of RAID 1 in Windows , which means that two or more disks are holding the exact same data. The files are constantly kept in sync, so that if one of the disks fails, you won’t lose any data.
You will need at least one empty disk to set up disk mirroring. I will show you how to mirror an existing disk without losing any data on the mirrored drive, In my case I'm using two 2TB Seagate Hard Drivers.  To start this,
1. From the tools menu you can select Computer Management.
2
2. Then you can select Disk Management from the next window and then you can see Disk1 and Disk 2 are in Unallocated state.
image
3.Just right click on the Disk1 and then you can select New mirrored Volume from the dropdown window.
image
4. Click Next to continue
image
5. Click on the drives you want to hold the mirrored data and click Add. Note that you can add any number of drives. Click Next.
image
6. Once you select the disk, click add and Next button to go to next step.
image
7. Assign it a drive letter, and then click Next.
image
8. Now you’re limited to using the NTFS file format for mirrored drives, so enter a volume label, then select Perform quick format. enable compression if you want, and then click Next.
image
9. Then click Finish to start formatting the drives.
image
10. You will be warned that the new drives will be converted to dynamic disks. Click Yes
image
11. we are done with the configuration. now you  can see the mirrored driver as a new Volume (E:) and in the Disk management console you  can see those to mirrored drivers in red color.
image